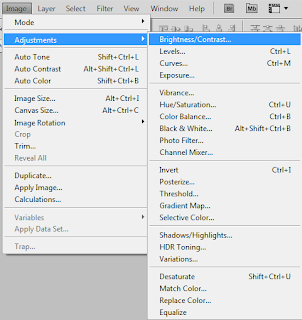
 I opened up the picture in Photoshop. The first thing I always do before editing the picture is change the brightness and the contrast of it. So I went on Image and Brightness/Contrast. When I pressed the a little window showed up. I changed the settings and came up with the 2nd photo.
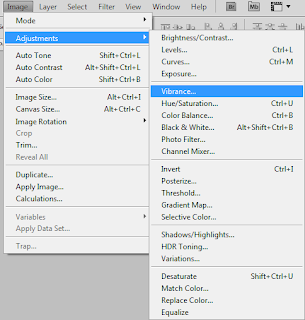
 The next thing I did was to go on Image and press Vibrance where a a little window showed up with settings. I changed it till the point I was happy with my picture and went onto the next step.
My next step. I go in Image once again, this time scroll down to the Black & White section and my image looked like in the image four (second line, first picture). The window would showed up, then i would change the settings and it would look like the second picture in line two.
I only changed the settings in the first two lines since mostly those colors are dominating in the photo. Next one easy step to make the picture brighter and cleared i used the Dodge Tool and the 1871 size square brush. Three strokes from top to bottom and it looks perfect!
To finish off the poster I cropped the image and added title and tagline.The very last thing I had to add was the 18 + rating. That's all.This is actually the technique I used to edit all my Film Noir photos. I found editing the pictures really useful for my photography skills as I learned few tricks using Photoshop I didn't knew before and finding my own way to make the pictures look the way they're meant to look makes me feel more accomplished. As a photographer, I also now have an additional perspective in taking photographs, now knowing the additional effects I can apply later.


No comments:
Post a Comment